“One of the causes of the troubles that beset us is the way our lives are guided by the example of others; instead of being set to rights by reason we’re seduced by convention.”
— Seneca, Letters from a Stoic
“One of the causes of the troubles that beset us is the way our lives are guided by the example of others; instead of being set to rights by reason we’re seduced by convention.”
— Seneca, Letters from a Stoic

I’ve spent some time sorting through options for a great single cup of coffee.
In a pinch, I’ll drink a cup of Keurig coffee — or any coffee for that matter.
But I have a preference for options that meet the following criteria:
My quest has led me to two options, each with its own advantages.
Pour over need not be difficult or costly. I’m a fan of good flavor, not a slave to what’s fashionable or expensive.
So here are my favorite pour-over implements:
1a. The Hario V60 02 Coffee Plastic Dripper does a great job, doesn’t break when dropped, and costs approximately $8.00.
1b. Hario 02 100 Count Coffee Paper Filters, Natural — They’re inexpensive and work great.
1c. Bonavita Gooseneck Electric Kettle — Simply fantastic, works without a stove-top nearby, and perfectly useful for coffee, tea, hot cocoa, etc.
With these implements at hand, you’re free to choose your favorite brand of coffee.
These basic pour-over instructions work perfectly well:
It’s that easy. No need to get hung-up with nit-picky details. Just do it. Adjust your method as desired.
For those who want nit-picky directions — here’s a detailed run-down of eight (yes EIGHT) pour over methods for the Hario dripper.
If you like bold, rich, smooth flavor, the freedom to let your coffee grounds steep, french-press style, freedom from french-press grit, and minimal cleanup, the Aerobie Aeropress is a truly awesome device (take a moment to read the Amazon reviews). Costs approx. $30.
Aeropress how-to instructions:
The following video does a great job of walking you through it.
That’s it.
Both have their advantages.
When I’m in the mood for espresso, I favor the Aeropress.
When I’m in the mood for a nice flavorful cup of coffee, I favor pour over.
Do you have tips and recommendations for improving the pour over or Aeropress experience, please post them below!
Given the pervasiveness of WordPress and the size of the development community, I believe this is a watershed moment. Arguably web developers are now officially living in a JavaScript-driven world. Might this be the beginning of the end for PHP?

NOTE: Others in the Apple support forum linked below have reported that these steps do the trick for them. It does not seem to be working for me, however. How about for you?
Daily my MacBook gets a number (2), (3), or (4) added after its computer name. After running searches and culling through forums, I found a tip which seems to be working.
Apparently this can be cleared up by repairing disk permissions. Here are the recommended steps:
Source: Apple Support Communities Discussion Here — in the Oct 29 reply by farquaad
For some reason this blog had all of its discussion settings reset, and plugins turned off, on June 2, 2015.
Within a couple of weeks, the blog had accumulated nearly 15 thousand spam comments. These comments were obviously spam, but with Akismet and WP Spam Shield down, and my discussion settings reset — they all went right through and were immediately published.
Deleting 14,700+ comments a screen at a time was not going to work well.
Thanks to this helpful post by the folks at Cats Who Code, I found a much more efficient fix using SQL in PHPMyAdmin.
The steps:
1. Backup your database. (To be safe.)
2. Login to PHPMyAdmin.
3. Navigate to the desired database. (The main database for the blog.)
4. Select SQL, which allows you to run SQL queries.
5. Run a first query to select all comments after the date that everything went bad:
SELECT * FROM wp_comments
WHERE comment_date > '2015-06-01 00:00:00'
6. If you’ve selected them right, you should see the results in a table. Sort the results by date, in both directions, and review them to ensure they’re what you want to delete.
7. If so, then delete them using this SQL command:
DELETE FROM wp_comments
WHERE comment_date > '2015-06-01 00:00:00'Last year I published a little Bootstrap book. I immediately wanted to write a next, bigger one. To help me pull it off, I teamed up with my colleague Ian Whitley. We’ve written it. And it’s live.
We wrote the book for those who want to make use of Bootstrap without being constrained by it. Properly understood, Bootstrap is a tool — a truly excellent tool among other tools — meant to be used with a craftsman’s touch, toward an end defined by the craftsman, not by the tool.
Let’s break that down. If you’re like us, you want to:
You don’t want Bootstrap to define your design. “Built with Bootstrap” need not mean “looks like Bootstrap.”
Bootstrap’s LESS files are beautiful to behold. Through the course of these chapters, you’ll develop a truly modular workflow. You’ll use Bootstrap’s LESS files intentionally and selectively. And you’ll augment them with your own custom LESS files.
Even if you’re new to LESS, we would argue there’s no better way to learn than this. We’ll help you get from zero to serious fast.
(Nothing against SASS, by the way. We wrote the book before Bootstrap had an official SASS port.)
Bootstrap comes equipped with JavaScript plugins for some of the most important and frequently used interface elements. We’ll walk you through the process of exerting detailed control over several of them. Beyond that, you may want to do additional things, such as add swipe interaction to the carousel for touch devices, animate the scrolling behavior for a single-page site, or add the PictureFill responsive image solution. We walk you through these things!
While it is convenient to grab Bootstrap’s CSS and JavaScript from the online CDN, you realize that there are huge performance gains to be had by selecting only the styles and plugins you need and optimizing them for performance.
We walk you through a very manageable process for cutting things down to size. No more 120KB CSS files or 68KB JavaScript files. We’ll cut those numbers in half, or better, and we’ll work to keep the number of HTTP requests low.
Your sites will load faster. You’ll get better page speed results. Your users will be pleased.
Bottom line: This book is for those willing to roll up their sleeves and dig into the guts of Bootstrap — the markup, the LESS, and the JavaScript — exerting thoughtful and careful control over the details — while creating mobile-first, user-friendly designs.
I almost forgot to mention — we walk you through creating a custom WordPress theme based on the fantastic Roots Theme.
If you’re on board with these desires, this book is for you.
In the coming weeks, we’ll be supporting the book with helpful tips, recommendations, and code goodies. So stay tuned!
Bootstrap Site Blueprints
Packt Publishing, February 2014
Packt eBook (ePub, Kindle, PDF) or Print + eBundle
Buy Amazon paperback or Kindle edition
I’ve rounded up some HTML5 site starter templates to help you get up and running with a project quickly.
Just the very basic HTML5 markup structure to get you started with a simple HTML5 page.
Ian Devlin has provided a nice little template that’s a bit more well rounded, including:
Get the HTML5 Bones Template on Github
Probably the most well respected starter template on the planet, and for good reason. Includes more touches, including:
Visit the HTML5 Boilerplate Homepage
Initializr goes further to help you custom configure a set of starter files. You can choose to include or exclude:
While testing a design for my upcoming Bootstrap 3 book (stay tuned, it’s coming soon!), I discovered the importance of the @screen-xs-max variable, and by extension the other @screen-__-max variables.
In my case, I had three columns set up using the class col-sm-4. This would lay them out side by side horizontally when the viewport width is above the @screen-sm breakpoint (by default 768px).

Then they would shift to a single-column layout below that breakpoint.
HOWEVER, because each column contained a floating button, the blocks of content were not clearing each other when arranged vertically. Buttons were flowing beside headings, and so on.

Thus, for the narrow single-column layout, I needed to set up a rule to force the columns to clear floating elements above them. I also wanted to add some vertical padding between them.
Seemed easy: Set up a media query with max-width: @screen-sm, and set up rules to clear floats and add padding only under that query.
On initial testing (i.e., resizing my desktop browser window), this seemed to work great.

The problem: This left a 1px zone where the columns remained narrow while clearing one another and thus still stretching down the screen vertically.
I didn’t find this until testing on the iPad mini, whose window width falls exactly in this 1 pixel zone! This was what it looked like:

After a bit of consternation-laden thought, I revisited Bootstrap’s breakpoint variables … and realized I’d stumbled on the reason for the @screen-__-max variables.
You’ll find these lines in Bootstrap’s variables.less file:
// So media queries don't overlap when required, provide a maximum
@screen-xs-max:              (@screen-sm - 1);
@screen-sm-max:              (@screen-md - 1);
@screen-md-max:              (@screen-lg - 1);
Note what these do: provide a breakpoint that is exactly 1px less than the next larger breakpoint — exactly what I needed to clear up this problem.
Here are my LESS lines, with the original offending media query, now commented out and replaced with the new better one:
// @media (max-width: @screen-sm) { // BAD: conflicts 1px with col-sm in markup
@media (max-width: @screen-xs-max) { // GOOD: fits within col-sm in markup
  [class^="col"] { // set columns to clear floats and add padding
    clear: both;
    padding-bottom: 40px;
  }
}
That did it. Problem solved.
See it and test the difference in this Codepen.
@screen-__-max variables can be your friend!If you’re working in Terminal and would like an efficient command to open a file in Sublime Text 2 — as in subl filename.html — here’s how to set it up.
I’ve now edited this post to begin with my favorite method, using an alias, then added a few more notes on creating handy aliases. Last is an alternative method which requires creating a symlink to Sublime Text’s own terminal connection.
This, for me, is the easiest method. We’ll create an alias for the basic Terminal command to open a file in Sublime Text 2, which would be: open -a Sublime Text 2 newfile.html
Here’s how to set up an alias so that you only have to type: subl filename.html
From Terminal …
1. Edit the bash profile, by typing:
vim .bash_profile
2. Then type i to insert.
3. Insert this line:
alias subl='open -a Sublime Text 2'This creates a new shorter version of the longer command. Typing subl will do what’s after the equal sign!
4. Hit the **Escape** key to stop editing.
5. Type :wq to save and quit the editor.
6. Type exit to exit the terminal session.
7. Quit Terminal and restart it.
8. Type subl filename.html to open the desired file in Sublime Text!
To create more aliases, you can now do it by editing the .bash_profile in Sublime Text. Just type: subl .bash_profile
Here are a few similar aliases I set up, by adding them to my .bash_profile, to efficiently open files in Firefox, Chrome, Safari, navigate to a frequently used directory, etc.
# Open a file in Sublime Text 2
alias subl='open -a Sublime Text 2'

#Edit Bash Profile in Sublime Text 2
alias bashprof='subl .bash_profile'

# Open a file in desired browser
alias ff='open -a Firefox'
alias chr='open -a Google Chrome'
alias saf='open -a Safari'

# Open file in Firefox, Chrome, and Safari
function testall { ff $1; chr $1; saf $1; }

# Shortcuts to directories
alias home='cd ~/'
alias nodeplay='cd ~/Nodeplay'
alias github='cd ~/Github'
alias sites='cd ~/Sites'

# Change to and list contents of a directory
function cdl { cd $1; ls; }
This Lifehacker post was helpful in the quest:
Become a Command Line Ninja With These Time-Saving Shortcuts – Lifehacker
Back to the topic of opening a file in Sublime Text 2 — it’s amazing how diverse and confusing are the opinions on this topic. The alias approach (above) seems easiest (and least frequently mentioned). Here is another method that uses a symlink, for those who prefer it.
1. Create a directory named bin in your user home directory.
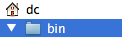
Now we need to create a symlink in this new directory …
2. In Terminal, enter the following line and hit return:
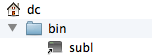
ln -s /Applications/Sublime Text 2.app/Contents/SharedSupport/bin/subl ~/bin/subl
This creates a symlink called subl. You’ll see it in Finder inside your newly created bin directory.
Next to add this new directory path to your Terminal bash profile.
3. In Terminal, open the bash profile in the vim text editor:
vim .bash_profile
4. Then type i to insert:
i
5. Type this new export path at the cursor:
export PATH=$PATH:~/bin

6. Now hit your keyboard’s Escape key to stop editing.
7. Save the file by typing :wq and pressing Return:
:wq
[Press Return]
8. Exit the terminal session by typing:
exit
9. Quit Terminal, then restart it.
10. If you need a quick file to test, you can create it via Terminal:
touch newfile.html
11. Now open your new file in Sublime Text by typing:
subl newfile.html
This should be your result!

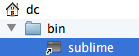
12. To change the command for opening a file in Sublime Text …
Simply change the name of the symlink in your bin directory. For instance, you could change the symlink name to sublime, and then type sublime newfile.html in Terminal to open your desired file.
Spot an update?
Let me know if you spot anything that needs updating or clarification.
Credit
Piecing these steps together from available online resources took a bit of work.
Helpful bits can be found in the Sublime Text docs, and in this gist by artero.
Credit for piecing together a working combo goes to @piperseth.
Huzzah!
At long last Bootstrap 3 is out — Release Candidate 1 that is. Read the blog post here.
Bootstrap 3 is a big deal. Some truly fantastic work has gone into it. Not least among the new touches — a new, more adept, mobile-first grid system.
I’m prepping a little introductory tutorial, which should be ready in the next few days. I hope to keep things going after that, with semi-regular tips and tricks for working with Bootstrap.
For those who enjoy working with Bootstrap in the context of the Roots Theme for WordPress, I’ve got some tuts in the works for you as well.
If that interests you, be sure to check back, and perhaps subscribe to receive updates.
Meanwhile, part of the reason I’ve been so quiet lately is that I’ve got a Bootstrap 3 book underway. My previous Bootstrap book was frankly too skinny. This one will be fatter, with blueprints for building a variety of types of websites using Bootstrap. I still have some writing, testing and revising to do. (So does Bootstrap 3 itself, during these two release candidate phases.) But I’ll be doing my best to get the book out as soon after the official release as possible!
Stay tuned.


